|
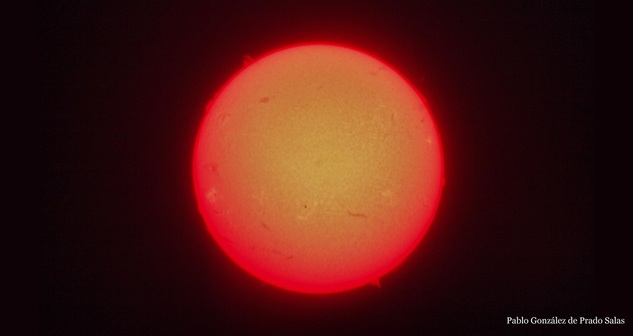
The Sun is the source of energy and life on Earth—most of it anyway. With its huge size at 8m 19s light-distance, it spans about half a degree in the sky; a perfect match to the Moon.
The Sun is beautiful and very dynamic, however, it is usually undervalued as an astronomical target. One good reason for this is that observing the Sun without the appropriate safety measures will result in blindness. It will be fast and won't even hurt. So, first things first: how can I safely observe the Sun?
 Pro-level Pro-level
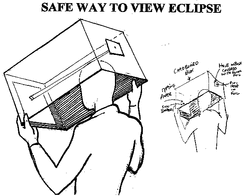
The simplest way to observe the Sun, the pinhole projection, is easy and fast, but will yield poor images. It is only used during partial eclipses, and sometimes produces fun natural displays. (Look at the shadows of the trees during eclipses.)
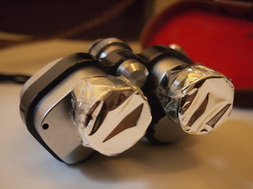
If you want to look to the Sun with the naked eye you will need an specialized filter. Home-made filters are strongly discouraged, specially given how easy and cheap it is to get certified eclipse glasses or a good filter. Beware that a home-made filter that provides a comfortable vision of the Sun might be letting invisible, harmful light into your eye. Heavy-duty welding masks are OK, but there is no good reason for this option, unless you happen to have one at home. A good filter will block around 99.999% of the solar light; that's how dangerous the Sun is.
By the way: the filter in the image above is just fine, there is no need to have a smooth surface.
Good news is the same filter you use for naked eye observation will be good for binoculars and telescopes (not so a welding mask, obviously). If that is what you need, buy the most convenient size (I use an A4 filter, 21.0 x 29.7 cm) and simply cut what you need, being sure to cover the whole telescope and discarding used or damaged pieces of film when in doubt. Modern filters look like aluminium foil. They are stronger, but handle it with care to avoid scratches.
Do not forget to cover or protect the finder of your telescope, it is only too natural to take a look out of instinct. You can find the Sun trying to produce the smallest shadow possible with the telescope—otherwise filter the finder. You can also remove the finder and use the shadow of the Sun to help you locate it in your telescope.
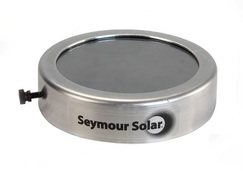
There are also glass filters for telescope, but they are much more expensive and promise similar performance, so I don't really know if they are worth it for occasional use.
Take care of the wind, as it could blow the filter with terrible consequences. Use some tape or something secure like that.
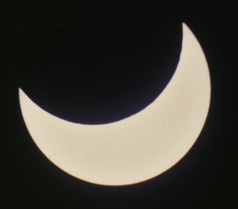
Filtered observation through a telescope or binoculars will allow you to see sunspots, which drift along the Sun and change daily. During an eclipse you may see some mountains and crater profiles at the edge of the Moon. At your right you have a picture (I took it on film!) from the Madrid eclipse in 2005. If you squint your eyes you can see the rugged profile of the Moon, and if you super-squint your eyes you may find some tiny sunspots. Also, dust.
Another option with optical instruments is to project the image of the Sun. The image will be a bit worse than with filters, but it can be a good idea if you want to show the Sun to a group of people. Simply take a cardboard and separate it from the eyepiece until you see a focused image. For better results you may try to shade the cardboard.
If you decide to project the Sun, it is imperative that you always stay by the telescope or binoculars. Someone, unaware of what you are doing, may want to take a peek. It happens, even if you are only leaving for a second. I have seen people get too close to disaster for this reason. Really, don't forget about this, specially with children around. If you must go away for whatever reason, cover the lens and point the telescope far from the Sun.
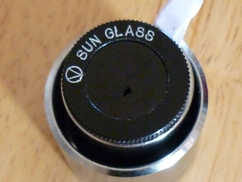 Burnt eyepiece filter. Burnt eyepiece filter.
You may have also heard about eyepiece filters. I believe they are quite rare nowadays, but you might still come across one in a cheap telescope set. Do not use them. As you can see in this video, the light intensity at the eyepiece of a telescope can be so intense, that this filters are known to crack easily. Do not take chances, not when other filters are so inexpensive.
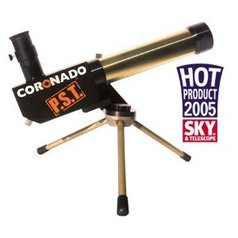
The only way to see true detail in the Sun is to use professional filters, which had been but a dream in the amateur market for a long time. Some years ago hydrogen‑α filters were introduced at competitive prices. Although it is not the only h‑alpha filter available, Coronado's PST was a revolution in amateur astronomy. Selling well under 1000$ it unveils an altogether new solar experience.
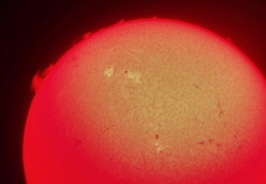
How do this filters work? The Sun emits light in different colours, coming from different depths. Of the light we see, the most intense—by far—comes from the “surface”, called photosphere. The temperature of the photosphere of a star defines the colour it looks. In the case of the Sun, the photosphere shines at about 5700 K, give or take some hundreds. Some regions are a bit colder than the rest, and so they shine a bit darker. Although they are incredibly bright, by contrast they appear to be black. These are the sunspots.
Above that surface there is the fancy stuff, like flares and the solar corona, but it is so very relatively dim, that we do not have a chance to see any structure of the atmosphere in normal circumstances.
The best-known exception to the rule are solar eclipses, during which all the light from the photosphere is blocked by the Moon and we are free to enjoy the corona and flares. This is why total solar eclipses are so otherworldly: they reveal an astonishing reality of the Sun that is always there, hidden in plain view.
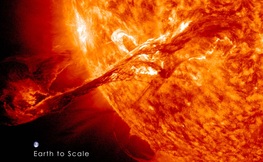 This picture is not mine, really This picture is not mine, really
The second way around the blinding light of the photosphere is to use a not-so-long-ago-professional filter, like an h‑alpha filter. These will block almost all of the light coming from the Sun, and will let pass only a fraction of a very, very specific light colour (a very narrow wavelength band). Imagine that the Sun were a gigantic yellow lighthouse, and you wanted to see some dim green lights in front of it. These filters will block every yellow-light ray, letting only the green light through. Free of the blinding lighthouse, the green lights would stand out nicely against the black background. And this is what an h‑alpha will do for us.
Taking pictures with a PSTGood news is the image of the Sun is still bright enough to allow short exposures and no tracking. Bad news is the PST is not a telescope that is easy to use. Why do I say so? First, chances are you will use it with a nasty photographic tripod*, which will make it very hard to keep the Sun where you want it and free of shaking. On top of that, we have to deal with an uncomfortable focuser, and if you do not use a DSLR camera (I use an Olympus EPL-1, not DSLR) you will not be happy about this. And lastly, the “only let this colour pass” setup is very delicate. So much so that it cannot just be tuned in the factories. Instead you have a tuning ring that you can use to see different details in different regions of the Sun. What may be good to see surface detail may obscure flares and so on. So, in order to get the image you want, you will have to play with both the tuning ring and the focus.
*It comes with a screw thread like photographic cameras, so a photographic tripod is the easiest choice.
If all of the above were not enough, most cameras will not focus on a PST, because the focusing range is too limited. The easy solution is to use eyepiece projection, which is cheap and easy with Hyperion eyepieces (other people agree with this). This was explained in the Moon page and also in the planet's page.
In any case, h-alpha telescopes open a new world in daylight astronomy and photography. The Sun can be one of the best targets in the sky, and it is surely the most dynamic, so it is worth getting one of these fancy telescopes.
Now that we know the Sun and how to observe it, we can take the next step into one of the most astounding shows there are in nature: solar eclipses.
|
*Zooming in will help, although this is not the full-resolution picture.

